Simple photo editor
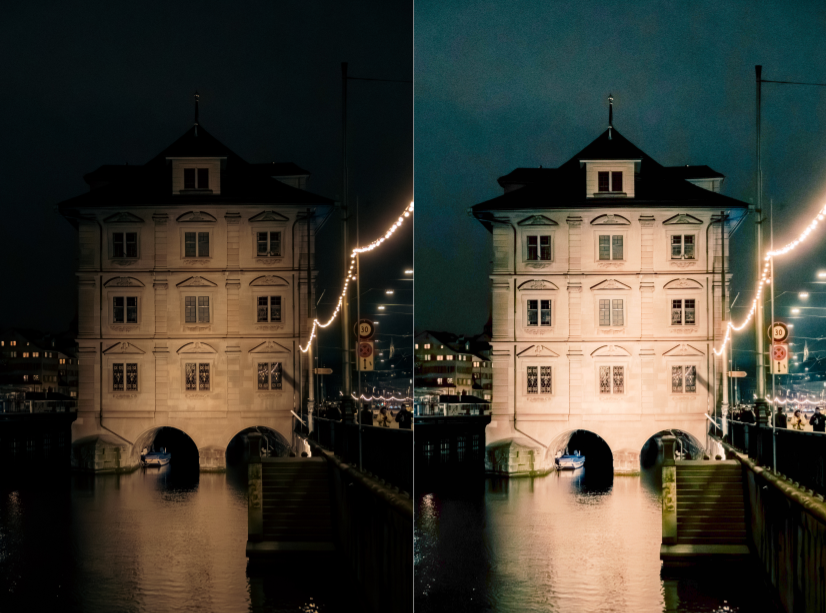
For this application, our goal will be to modify the exposure of a photograph. Before we begin, we need to understand what a digital photograph is made of—how the computer “understands” photographic information and how it is represented.
Behind an image lie 3 channels: RGB – RED, GREEN, BLUE. The color of a pixel is determined by the sum of the subpixel intensities in each channel. For a standard 8-bit channel, the intensity of each color can take values between [0, 255], where 0 is black/off and 255 is maximum intensity.
Thus, to manipulate the exposure of the photograph, all we need to do is manipulate the intensity values of all channels simultaneously, increasing the values to increase exposure and decreasing them to underexpose.
Requirements:
- Development environment, e.g., VS Code
- Git for Windows to download the libraries that will help us build the application.
- vcpkg installation to handle the library compilation for us.
- Commands to be executed in PowerShell:
- cd C:</li>
- git clone https://github.com/microsoft/vcpkg.git
- cd vcpkg
- .\bootstrap-vcpkg.bat
- .\vcpkg integrate install
- .\vcpkg install glfw3 imgui[opengl3-binding,glfw-binding] stb
Why all of these?
- GLFW3 – for window creation and mouse handling
- OpenGL – for communication with the graphics card
- Dear ImGui – for the slider we will use to adjust exposure
- stb_image – helps us transform a .jpg file into pixel vectors that we can manipulate as we wish.
We will now discuss how I planned to approach the application. First, I need to be able to read the image I am going to modify. I need the pixel intensities from each channel, which I will store in a vector. Then, I will be able to manipulate them by changing their values. Finally, I will need to resend them to be read.
What does each library/header do?
#include “stb_image.h” – the image reader. With its help, we will transform the photo into a huge string of numbers in RAM—the pixels.
#include <GLFW/glfw3.h> – the GLFW part explained above
#include “imgui.h” – for buttons and sliders
#include “imgui_impl_glfw.h” – the link between ImGUI and the window created by GLFW – tracking mouse position on the screen
#include “imgui_impl_opengl3.h” – drawing using the graphics card
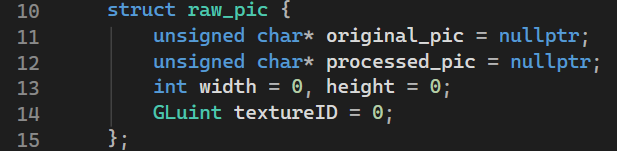
We must understand that the image we process is actually a pointer to an area in the RAM. Therefore, we will use the abstract data type “struct raw_pic” to reserve space for both the original image (which we will not modify) and the modified one (which will be a modified copy of the original).
Moving on to the exposure logic: we need to iterate through the entire vector of values. Since our image has a width and a height, the number of values to process will be equal to the product of the two multiplied by 3. Why did I multiply by 4 instead? There is also an alpha channel we haven’t mentioned, which tells us how opaque or transparent a pixel is. Since we don’t care about it for exposure, we will ignore it when we encounter it.
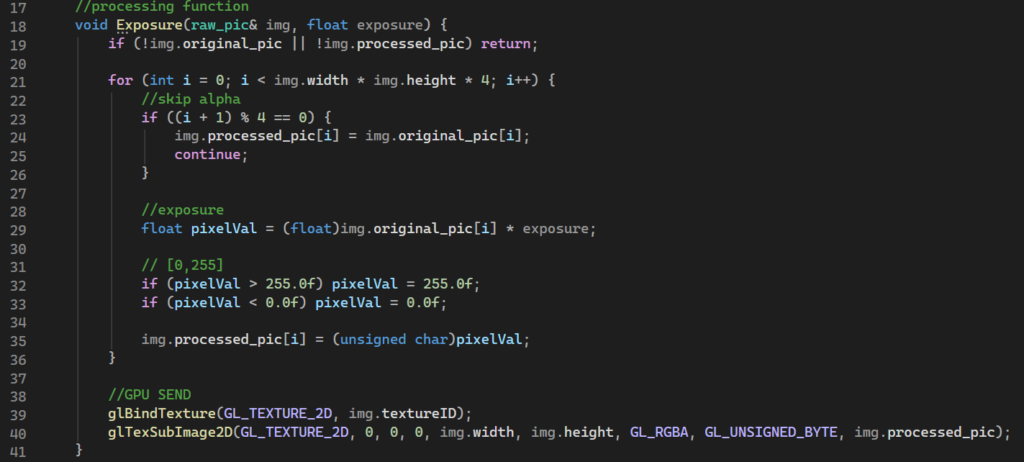
We will use a function for this calculation. It will be of type void because I don’t want it to return anything, but rather to process some data. Since I want to preserve the modified values of the image, I am forced to use pass-by-reference: raw_pic& img. It is also more efficient, as a copy is no longer created when the function is called. The second argument is, obviously, the exposure value.
The function is easy to understand. As I said, when I reach channel no. 4 (alpha), I ignore it and move on. It is very important to ensure we do not exceed the limits of pixel intensity—meaning the pixel value must stay between [0, 255].
The glBindTexture function sets an internal pointer. From this point on, any command directed to GL_TEXTURE_2D will be routed to the video memory location indexed by img.textureID. In other words, the function’s role is to point to where we are performing the operations.
The glTexSubImage2D function is a content update function. We will take the arguments as they are; it is sufficient for the complexity level of our application.
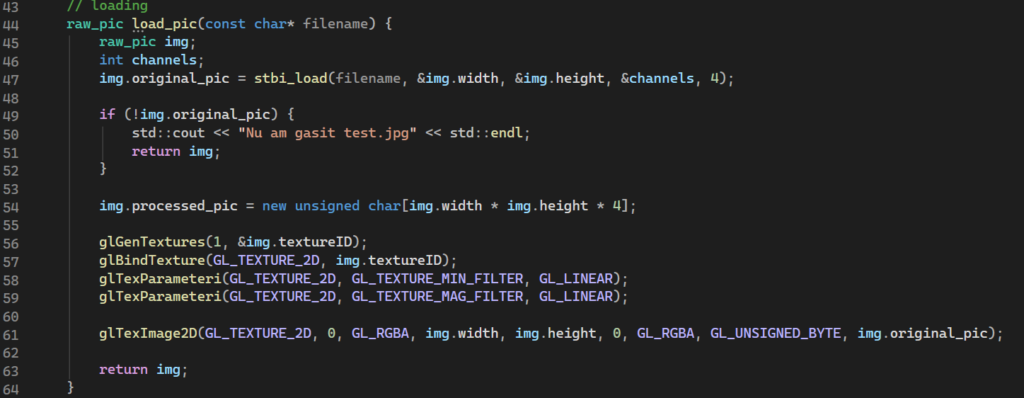
In this function, we decompress our image from jpg format into strings of values for each channel. The stbi_load function handles this. If everything goes well, we will need to dynamically allocate memory in the Heap. This buffer will be the destination for mathematical calculations before the data is resent to the graphics processor.
The glGenTextures function: Queries the graphics driver to reserve a unique identifier in VRAM. It is, essentially, a “handle” type allocation.
- glTexParameteri(GL_TEXTURE_2D, GL_TEXTURE_MIN_FILTER, GL_LINEAR);
- glTexParameteri(GL_TEXTURE_2D, GL_TEXTURE_MAG_FILTER, GL_LINEAR);
These instructions define the behavior of the Texture Processing Unit (TMU) in the GPU:
Linear Interpolation: If the image is displayed at a resolution different from its native one, the GPU will perform a weighted average between neighboring pixels (bilinear filtering). Visually, this prevents “aliasing” artifacts (jagged edges). (Quoted from AI, I had no idea what this did).
The glTexImage2D function handles the physical allocation of space in the graphics card memory, transfers data from the original image to the graphics processor, and sets the format—namely a W x H matrix with 4 components per pixel (each channel).
Next is the main function, where we initially open or “draw” a window where we will load the photo and a slider to manipulate the exposure value.
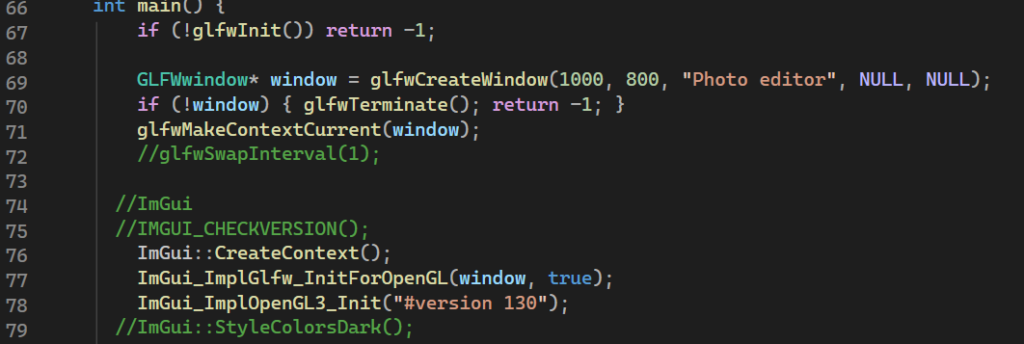
The ImGui::CreateContext(); function for initializing ImGui?
ImGui_ImplGlfw_InitForOpenGL(window, true); for integration with the operating system. Thus, if we move the mouse or press a key, ImGui intercepts these events.
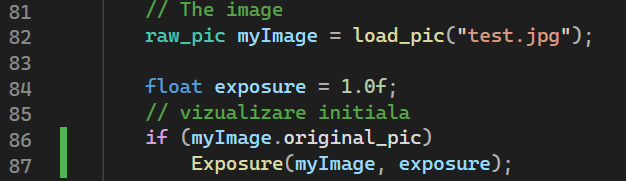
We load the photo and define the parameters we need.
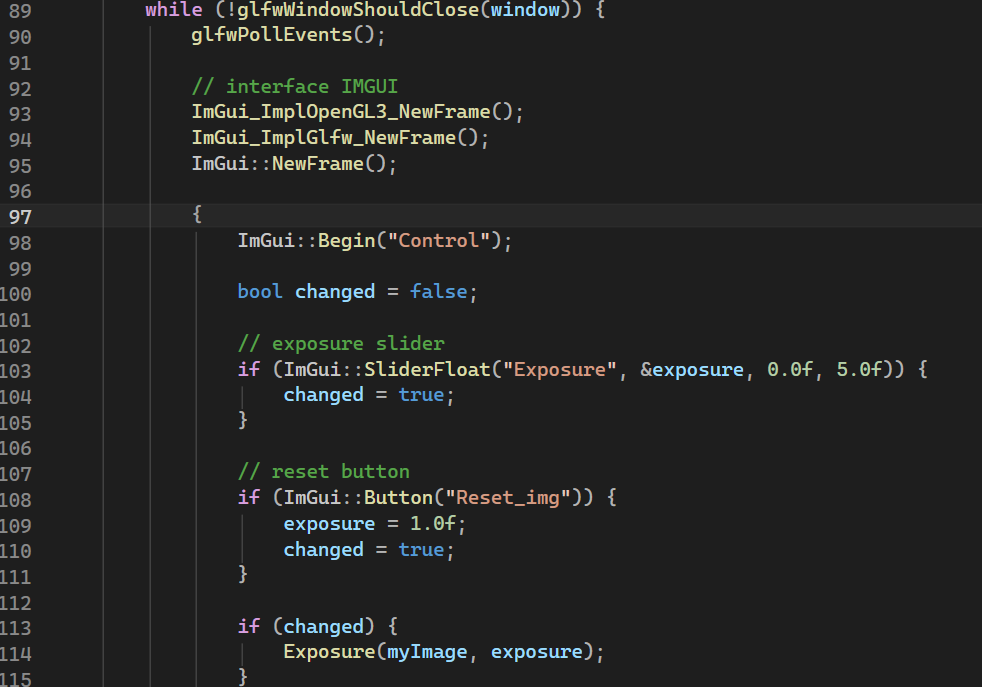
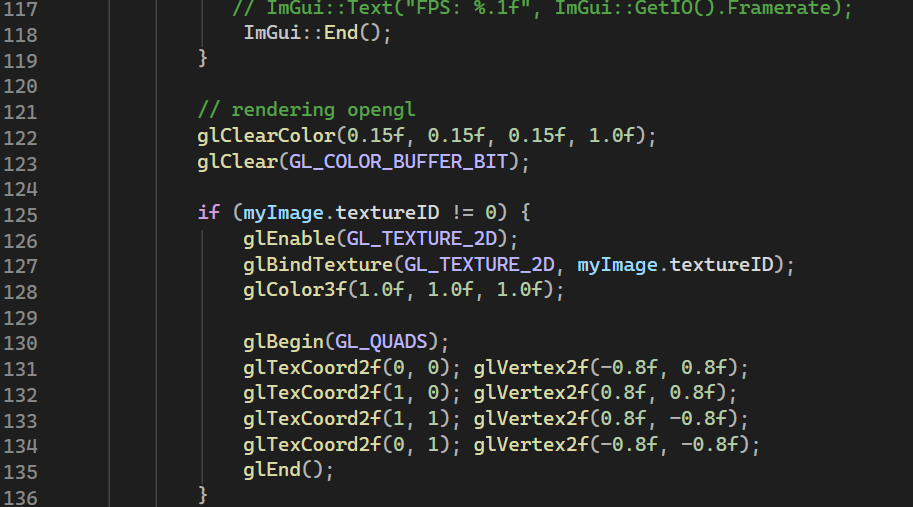
All we are doing is creating the window where we will run the application and the slider with which we will modify the exposure. The functions inside if (myImage.textureID != 0) {…} are meant to load the image correctly.
The ImGui::Render() function does not draw anything on the screen. It only prepares a data package that the GPU can understand.
ImGui_ImplOpenGL3_RenderDrawData(ImGui::GetDrawData()) : executes the drawing of the ImGui interface. This call must be placed after drawing the photo; otherwise, it will appear behind it.
glfwSwapBuffers: without this, we would see a static screen because no changes would be transmitted to the monitor.
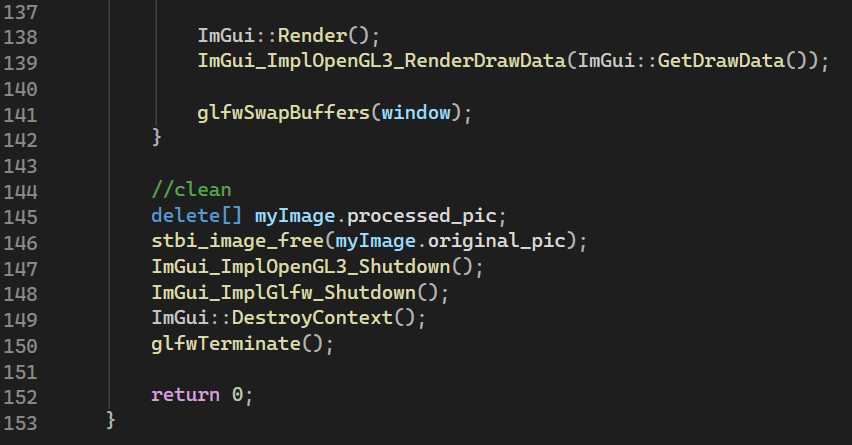
The rest is just cleanup.
Thank you for your attention!
The full code can be found at https://github.com/renea-bogdan/Simple-photo-editor
Note: AI was helpful in understanding some concepts that were then explained in detail in this tutorial, as well as in building the application.